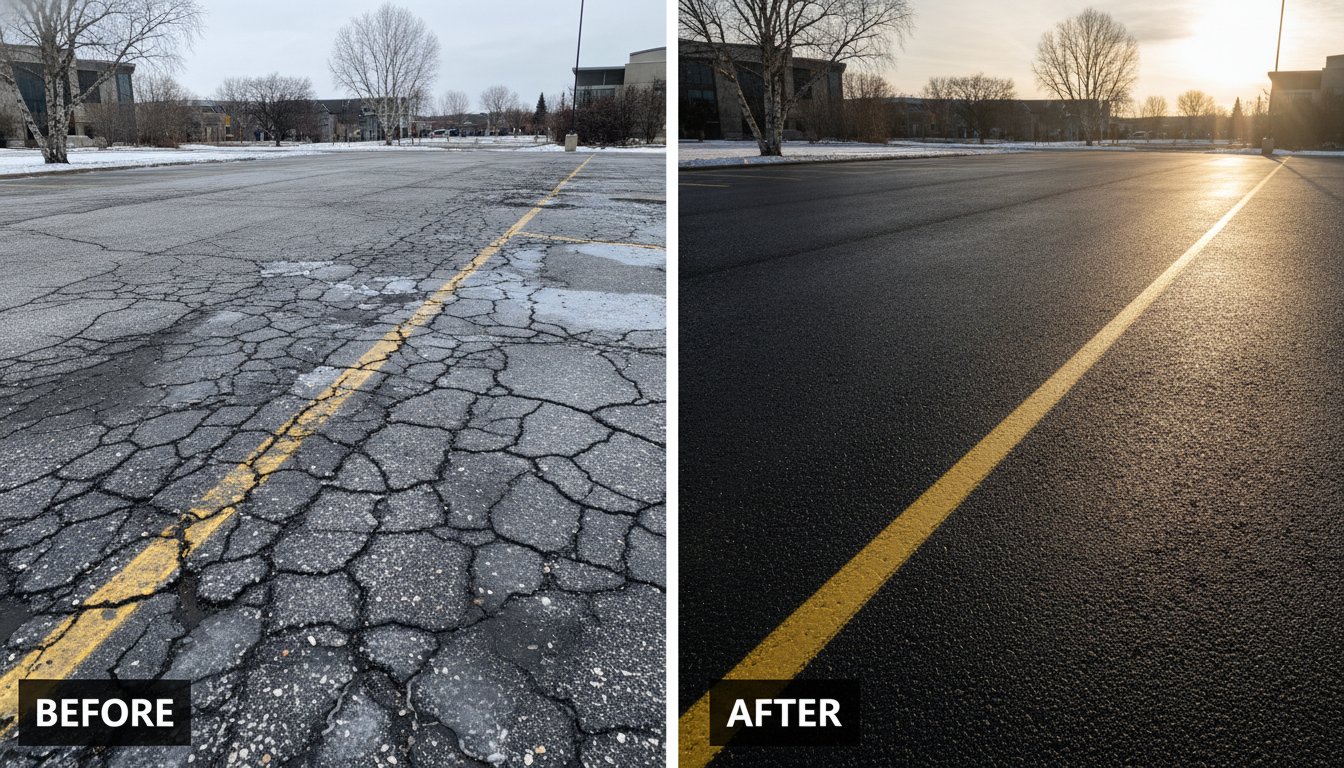
Sealcoating is a precision chemical application designed for long-term structural defense, not just a cosmetic "paint job" for your home's exterior. When you understand what to expect during driveway sealcoating, you can transform a potentially stressful maintenance task into a seamless property upgrade that adds years to your asphalt. It's natural to feel some uncertainty about the logistics, especially when you're trying to balance a busy schedule with the necessary stewardship of your property investment.
You likely want that deep, jet-black finish but worry about sealer tracking into your house or how long your vehicles will be displaced. We agree that a maintenance project shouldn't cause more headaches than it solves. This guide provides a professional checklist to help you navigate the entire process from initial preparation to post-cure care. We'll examine the specific steps involved in crack filling, the timeline for safe vehicle access, and how these measures protect your driveway against the 2026 freeze-thaw cycle.
Key Takeaways
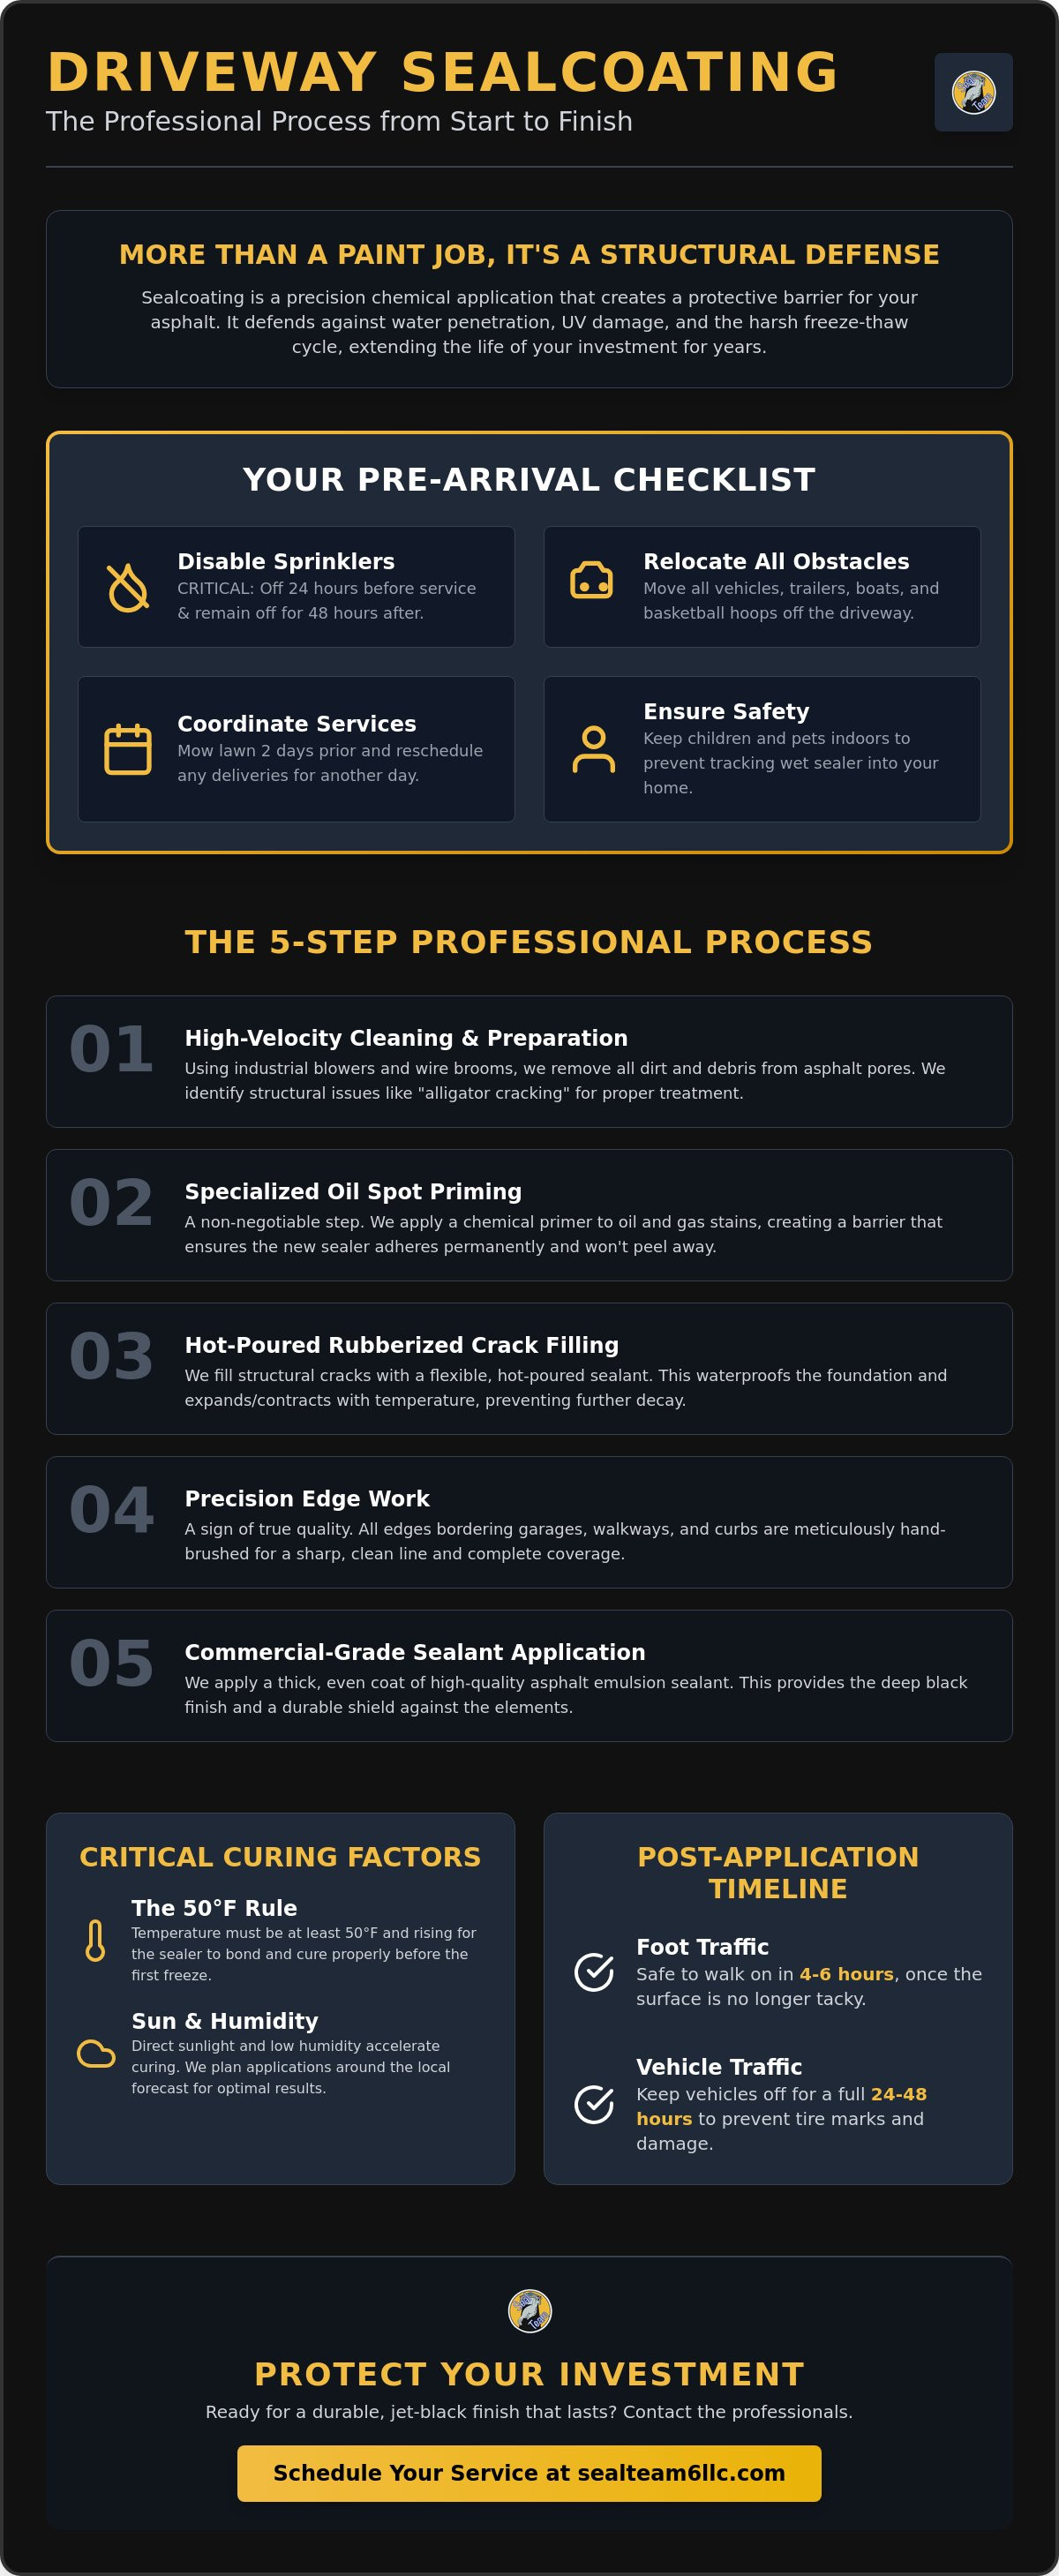
- Learn how to properly prep your property, including why disabling sprinklers for a 72-hour window is vital for a successful chemical bond.
- Understand what to expect during driveway sealcoating, from high-power cleaning to specialized oil spot treatments that ensure long-term material adhesion.
- Discover the "50°F Rule" and how Minnesota's unique humidity levels can impact your sealant's ability to cure correctly before the first freeze.
- Follow a precise post-application timeline to avoid tracking sealer into your home or damaging the soft surface before it fully hardens.
- Identify the signs of a quality crew, such as hand-brushing edges and using commercial-grade asphalt emulsions rather than outdated coal tar products.
Preparing Your Property for Sealcoating: The Pre-Arrival Checklist
Successful driveway preservation starts long before our crew arrives. Understanding what to expect during driveway sealcoating begins with a clear workspace, as the quality of the bond depends on a surface free of obstructions and moisture. Think of this preparation as the foundational step in stewardship for your asphalt investment. When the work zone is properly staged, the application process is efficient and the results are far more durable.
Water management is perhaps the most critical logistical detail. You must disable all automatic sprinkler systems 24 hours prior to our arrival and keep them off for at least 48 hours after the application is complete. Even a small amount of water from a stray sprinkler head can wash away uncured sealer, leading to streaks or complete material failure. A professional application of pavement sealing requires a dry, stable environment to ensure the liquid emulsion adheres correctly to the asphalt surface.
Open communication with your household and neighbors also prevents common frustrations. Notify your neighbors that they may need to provide street parking for your vehicles and warn them about the temporary noise from high-powered blowers. Small details, like moving trash cans to the curb early or rescheduling a lawn care service, ensure the work zone remains pristine. This proactive approach is a hallmark of a well-maintained property.
Vehicle and Obstacle Relocation
Ensure all cars are out of the garage before the crew arrives. Once the process begins, you won't be able to cross the wet sealer, effectively "trapping" any vehicles inside for 24 to 48 hours. Move larger items like trailers, boats, or portable basketball hoops to a secondary location at least 24 hours in advance. It's also wise to check your delivery apps; rescheduling Amazon or UPS drop-offs for a different day prevents heavy trucks from turning around on your fresh surface.
Landscape and Utility Coordination
Landscape prep is about more than just aesthetics. We recommend mowing your lawn two days before service. This timing allows the grass clippings to settle so they don't blow onto the wet sealer. Trimming back overhanging grass and clearing debris from the edges of the asphalt allows our team to apply the product right to the perimeter. If you have hidden utility caps or unique drainage areas, please mark them with a small flag or cone. Finally, keep pets and children indoors during the application. This prevents accidental tracking of the sealer onto your carpets or unintended skin contact with the wet material.
The 5-Step Professional Sealcoating Process
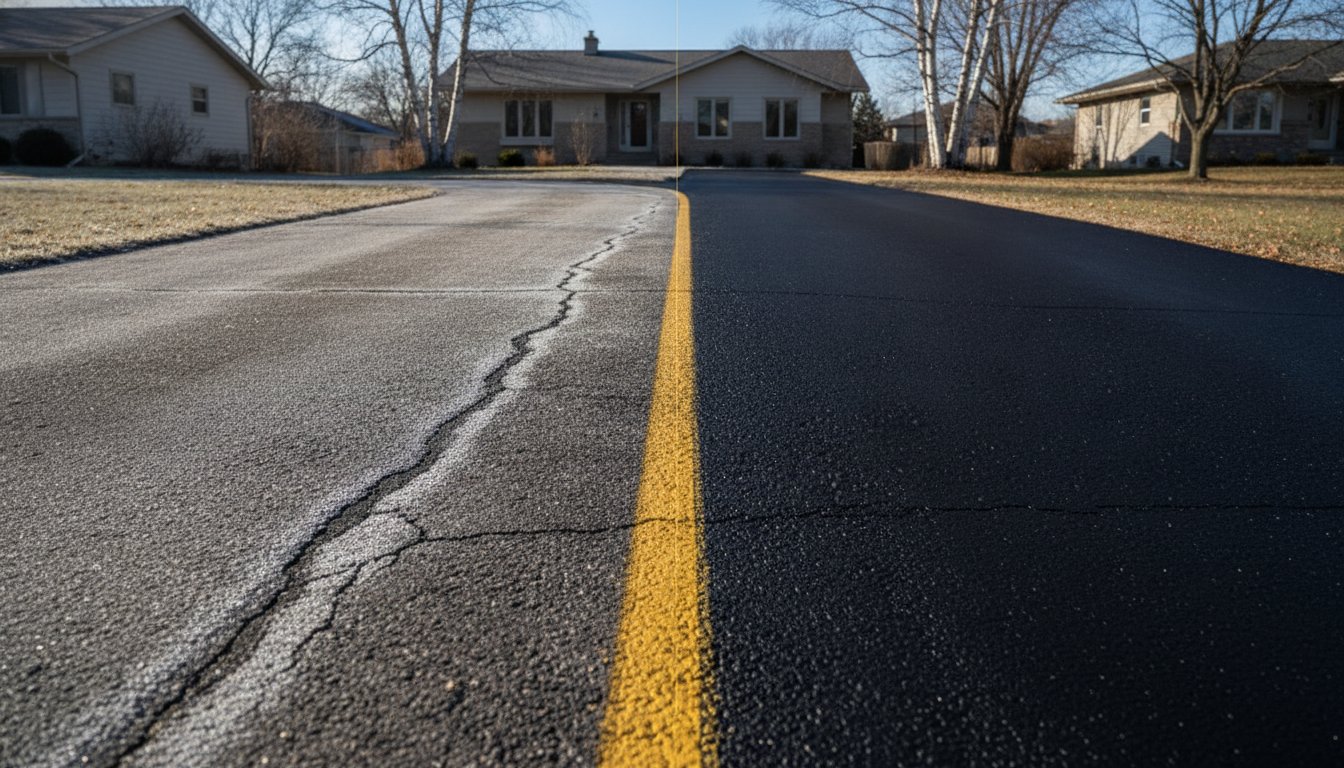
Once your property is prepped, the professional crew begins a methodical transformation of your asphalt. Understanding what to expect during driveway sealcoating involves recognizing that the final jet-black finish is only as good as the technical steps taken underneath. We follow a strict five-step sequence designed to ensure the material bonds permanently to your driveway, providing a defensive layer against the elements.
Cleaning and Surface Preparation
Precision starts with a bone-dry, debris-free surface. Our crews utilize high-velocity professional blowers and industrial wire brooms to extract deep-seated dirt from the asphalt's pores. While a standard garden hose might seem efficient, it actually introduces moisture that can trap silt and prevent the sealer from adhering correctly. During this phase, we also look for "alligator cracking." These small, interconnected cracks often signal a failing base that may require more intensive care than a standard maintenance coat. Applying a specialized oil spot primer is a non-negotiable step for asphalt longevity because it creates a chemical barrier that prevents oil stains from bleeding through and degrading the new sealer from the bottom up.
Crack Filling vs. Surface Sealing
Structural integrity depends on keeping water out of the driveway's foundation. We use a hot-poured rubberized sealant that expands and contracts with shifting temperatures, which is essential for surviving the local freeze-thaw cycle. You can learn more about this specific protection in our guide to Expert Driveway Crack Filling in Minneapolis & Saint Paul. It is important to set realistic expectations; while this process blocks water and prevents vegetation growth, it won't make large cracks disappear entirely. Instead, it bridges the gap with a flexible, waterproof membrane that stops further decay.
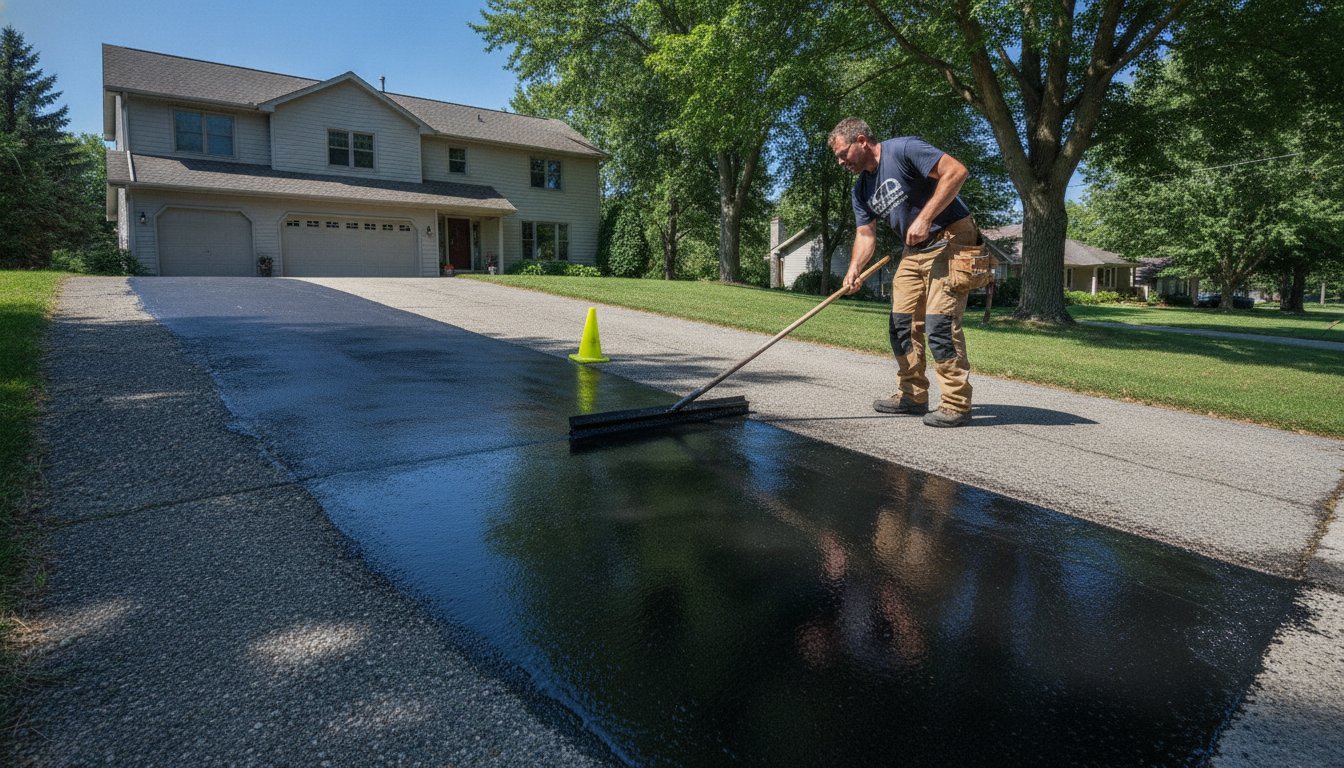
The final stages involve protecting your surrounding property and applying the main protective layer. A quality crew will always hand-brush the edges of your driveway. This manual technique protects your siding, stone pavers, and garage doors from the overspray often associated with high-speed application. For the main surface, we balance spray and squeegee techniques to achieve the optimal thickness. This meticulous approach aligns with the standards found in the Asphalt Surface Treatments Guide, ensuring the material is neither too thin to protect nor too thick to cure. If you're ready to restore your driveway's defense, consider scheduling professional seal coating services to secure your property's long-term value.
Environmental Factors: Temperature, Humidity, and the Minnesota Window
Asphalt maintenance is a weather-dependent science. While the physical application takes only a few hours, the chemical bond is dictated by the atmosphere. The most critical benchmark is the 50°F Rule. This standard requires that both the air and the surface temperature remain above 50 degrees throughout the entire application and for at least 24 hours afterward. Many homeowners focus on the daytime high, but night-time lows are just as vital. If temperatures plumment after the sun goes down, the curing process stalls, which can lead to a brittle finish that fails prematurely.
Humidity is another factor that is often overlooked. In the Twin Cities, summer moisture levels can be surprisingly high, often doubling the required dry time compared to arid climates. High humidity prevents the water in the sealer from evaporating, keeping the material in a "tender" state longer than expected. Understanding these climate nuances is a major factor in what to expect during driveway sealcoating if you live in the Midwest. Our teams monitor local radar and dew point data to ensure we aren't applying material in conditions that invite failure.
The Ideal Application Window
The Minnesota sealcoating season is relatively short, typically running from late May through September. While early summer is popular, late-season sealing is arguably the most important for property preservation. This final window allows you to establish a defensive barrier before the first application of road salt and the mechanical stress of snow plows. The curing of polymer-modified asphalt emulsion is a chemical transition where water evaporates to leave behind a dense network of interlocking solids that shield the pavement. This shield must be fully "set" before the ground freezes to prevent water from seeping into the pores and causing frost heaves.
Weather Risks and Rescheduling
Pop-up afternoon showers are a reality of summer, but they pose a significant "Wash-Off" risk to fresh sealer. If rain hits before the material has had a few hours to skin over, it can literally rinse the product off your driveway and onto your lawn or into the storm drains. Reputable contractors will always postpone a project if there is more than a 30% chance of rain within a 24-hour window. Knowing what to expect during driveway sealcoating also means preparing for inconsistent drying. If half of your driveway is shaded by large oak trees while the other half sits in direct UV light, the shaded area will take significantly longer to cure. We adjust our application speed and technique to account for these micro-climates on your property.
Post-Application Care: The Curing Timeline
The application of the sealer is merely the beginning of the chemical preservation process. Once our crew leaves, the driveway enters a critical curing phase where the liquid emulsion transforms into a hard, protective shell. Understanding what to expect during driveway sealcoating includes knowing how to manage this timeline to prevent tracking or property damage. During the first four hours, the driveway is in the "Wet Zone." In this state, the material is highly susceptible to tracking. Even a curious pet or a stray leaf can leave a permanent mark, so keeping the area completely cordoned off is essential for a pristine finish.
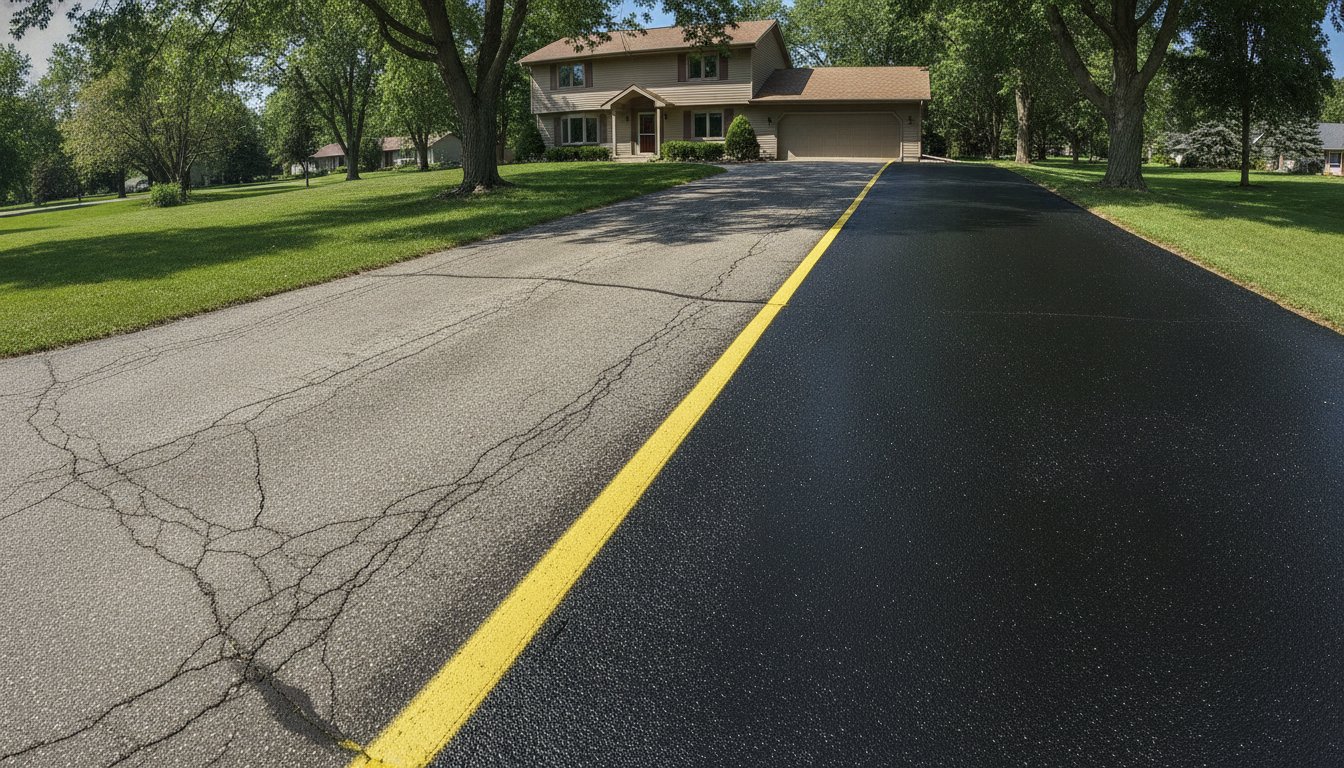
Between the 24 and 48-hour mark, the surface typically becomes safe for foot traffic. You'll see the color transition from a shiny, deep black to a rich matte finish. While you can walk on it, the material remains soft enough that vehicle tires can still cause indentations. We recommend waiting the full 72 hours before resuming normal driving and parking. This 72-hour rule ensures the polymer chains have fully linked, creating the durability needed to withstand the weight of a standard vehicle without compromising the seal.
The First 72 Hours
Wait for that uniform matte finish before stepping onto the asphalt. Even if it looks dry, the layers underneath may still be curing. It's especially vital to keep heavy equipment, such as dump trucks or large delivery vans, off the driveway for at least five days. These heavy loads can crush the fresh sealer before it achieves its maximum structural strength. For a deeper look at the chemistry behind this process, read our guide on Mastering Asphalt Sealer Application.
Long-Term Maintenance Tips
Once the initial 72 hours pass, you can resume most normal activities, but be gentle for the first few weeks. You can wash your car on the driveway after about seven days, provided you don't use harsh degreasers. You might notice "Power Steering Tears," which are small scuff marks caused by turning your tires while the vehicle is stationary. These marks are a normal part of what to expect during driveway sealcoating and usually fade as the sealer continues to harden over the first month. To ensure your investment remains protected, a professional asphalt maintenance contractor should perform a biennial inspection to catch small issues before they require major repairs. To keep your property in peak condition, schedule your biennial inspection today.
Selecting a Professional Asphalt Maintenance Contractor
The final step in ensuring your driveway's longevity is choosing a partner who values precision over speed. When you're evaluating what to expect during driveway sealcoating, the quality of the contractor determines whether your investment lasts three years or just one. In the Twin Cities, local experience isn't just a bonus; it's a requirement for surviving the 2026 freeze-thaw cycle. A specialist who understands our specific climate will prioritize the chemical bond between the sealer and the asphalt rather than just providing a quick cosmetic fix.
Material quality is the first thing you should investigate. While some contractors still use outdated coal tar sealants, the industry has shifted toward asphalt emulsions. In fact, Minnesota state agencies began phasing out coal tar as early as July 2010 due to environmental and health concerns. Modern, polymer-modified emulsions offer the flexibility needed to withstand shifting ground temperatures. Beyond the material, look at the application methods. A quality crew will always hand-brush the perimeter of your driveway. This manual care protects your garage doors and landscaping from the messy overspray that often accompanies lower-quality, high-speed jobs.
Transparency is another indicator of professional authority. Be cautious of door-to-door solicitors who claim they have "leftover material" from a nearby project. Professional-grade sealants are mixed to specific ratios for each job, and reputable contractors don't have random surplus sitting in their trucks. If a deal sounds too good to be true, it likely involves a diluted product that won't provide the structural defense your driveway requires. This is why checking for insurance and a solid local reputation is essential before allowing anyone to work on your property.
Questions to Ask Your Estimator
Before signing a contract, ask if they use commercial-grade sealants or diluted residential products from a big-box store. You should also clarify if crack filling is included as a separate line item or part of a bundled package. Understanding these details helps you see the long-term value in a professional application. For a deeper breakdown of these variables, you can read our analysis of Sealcoating DIY vs. Professional to see why the right materials matter for Minnesota homeowners.
The Seal Team LLC Difference
At Seal Team LLC, we focus specifically on the unique climate challenges of the Minneapolis, Saint Paul, and surrounding metro areas. We view our work as a form of stewardship, treating every driveway as a long-term asset that requires a scientifically sound approach to preservation. By choosing a local specialist who understands what to expect during driveway sealcoating in our region, you ensure your property remains protected for years to come. Request your free sealcoating estimate today from Seal Team LLC and let us help you defend your investment.
Securing Your Property's Long-Term Value
Protecting your asphalt is a necessary form of stewardship that requires more than just a surface-level coat of paint. By following a structured pre-arrival checklist and respecting the critical 72-hour curing window, you ensure the structural integrity of your driveway for years to come. Knowing what to expect during driveway sealcoating empowers you to make informed decisions that prevent tracking, scuffing, and premature material failure. It's about aligning professional application techniques with the specific environmental demands of our region.
As a locally owned and operated business in the Twin Cities, we specialize in defense against the harsh Minnesota freeze-thaw cycle. We utilize commercial-grade, polymer-modified sealants that offer superior durability compared to standard residential products. This expert-led approach transforms a routine maintenance task into a lasting property investment. When you're ready to restore your driveway's deep-black appearance and structural defense, we are here to help. Get a Free Professional Sealcoating Estimate from our team today. Your driveway deserves the highest level of proactive care.
Frequently Asked Questions
How long do I need to stay off my driveway after sealcoating?
You should wait at least 24 to 48 hours for foot traffic and a full 72 hours before driving or parking vehicles on the surface. While the sealer may look dry within a few hours, the underlying layers need time to chemically bond and harden. Rushing this process can lead to tire indentations or tracking material into your home. This timeline ensures the polymer chains have fully linked for maximum durability.
Will sealcoating fill in the cracks in my driveway?
Sealcoating is a protective surface treatment and is not designed to fill structural gaps or deep fissures. While the liquid sealer may hide very fine hairline cracks, larger openings require a separate hot-poured crack filling service. Addressing these gaps before sealing is vital to prevent water from reaching the driveway foundation. A comprehensive maintenance plan always treats crack repair as a distinct, foundational step in the preservation process.
What happens if it rains right after the sealer is applied?
Rain within the first few hours of application can cause the uncured sealer to wash off the asphalt and onto your lawn or into storm drains. This "wash-off" usually requires a complete re-application once the surface is dry again. To avoid this, professional contractors monitor local radar for a clear 24-hour window. If a surprise shower occurs, the damage must be assessed once the rain stops to determine the best restoration path.
Why does the new sealer have tire marks or scuffing?
Scuffing and tire marks, often called "power steering tears," are a normal part of what to expect during driveway sealcoating while the material is still tender. These marks occur when tires turn on a stationary vehicle, but they typically fade within a few weeks as the sealer continues to harden. To minimize this, avoid making sharp or stationary turns during the first month. The marks are cosmetic and don't indicate a failure of the protective seal.
Can I sealcoat a brand-new asphalt driveway immediately?
You should wait approximately 6 to 12 months before sealcoating a newly paved driveway. New asphalt contains light oils that must evaporate, or "cure," before a sealer can properly adhere to the surface. If you seal too early, the material may peel or fail to bond correctly. Once the asphalt has turned from a deep black to a dark gray, it's generally ready for its first protective application.
How often should I hire an asphalt maintenance contractor for sealcoating?
Most residential driveways benefit from a professional application every two to three years. Factors such as heavy traffic, snow plow usage, and exposure to road salt can accelerate the wear of the protective layer. Hiring an asphalt maintenance contractor for biennial inspections allows you to catch small issues like hairline cracks before they become costly repairs. Regular maintenance is the most effective form of stewardship for your property investment.
What is the best temperature for applying asphalt sealer in Minnesota?
The ideal temperature for application is between 70°F and 90°F, though the most important rule is that temperatures must stay above 50°F for at least 24 hours. In Minnesota, this window typically opens in late May and closes by mid-September. Consistent warmth is necessary for the chemical evaporation process. If the temperature drops too low at night, the sealer won't cure properly, leading to a brittle finish that lacks durability.
Is professional sealcoating better than the buckets I buy at the hardware store?
Professional-grade sealants are significantly more durable than the standard DIY products found in hardware stores. Commercial mixtures often contain polymer additives and higher solids content, which provide a stronger bond and longer lifespan. Professionals also use specialized equipment to ensure a uniform thickness that isn't possible with a manual squeegee or brush. Investing in a professional application ensures you won't have to repeat the process every single year.